How to Connect to Drill from Tableau on Windows
Provides instructions for using the Drill ODBC driver to connect Tableau on a Windows PC to Drill on an HPE Ezmeral Data Fabric node.
The instructions in this document were created using the following environment:
- PC running Windows 10 (64-bit system)
- Secure HPE Ezmeral Data Fabric 7.0.0 node (non-FIPS compliant)
- Drill 1.16.1.400 (EEP 8.1.0) installed on the HPE Ezmeral Data Fabric node
- Tableau version 2021.4.3 installed on the Windows PC
This document walks you through the steps required to:
- Download, install, and configure JDK 11
- Install the Data Fabric 7.0.0 client on a Windows 64-bit computer (Required to access Drill on the HPE Ezmeral Data Fabric) node
- Download and install the Drill ODBC driver (v1.3.22.1055) and configure the DSN
- Connect to Tableau (version 2021.4.3)
- Run a couple of queries to test the Tableau connection to Drill
Download and Install JDK 11
Complete the steps in the following sections to download and install JDK 11. Once you have
it installed, set JAVA_HOME.
Download JDK 11
Downloading JDK requires an Oracle account. You can create an account before completing the steps listed in this section, or you can follow the steps listed, create your account in step 4 and then repeat steps 1 - 4 again, but instead of creating an account in step 4, entering your credentials.
- Go to https://www.oracle.com/java/technologies/downloads/#java11.
- Scroll down to the Java SE Development Kit 11.0.14 section and select the Windows tab.
- Click jdk-11.0.14_windows-x64_bin.exe to download.
- Accept the license agreement and click the download button. An Oracle account log in window appears. Enter your Oracle account credentials or click Create Account. If you enter your credentials and click Sign in… the download begins. If you create an account, complete steps 1 - 4 again to get the download after you create your account.
Install JDK 11
Click the downloaded jdk-11.0.14_windows-x64_bin.exe file. An installation
wizard walks you through the installation process. Once installation completes, set the
JAVA_HOME environment variable.
Set JAVA_HOME
JAVA_HOME:- In Windows, go to View advanced system settings. The System Properties window appears.
- Select the Advanced tab.
- Click Environment Variables.
- Click New. The New System Variable window opens.
- Enter
JAVA_HOMEas the variable name. - Enter
C:\PROGRA~1\Java\jdk-11.0.14as the Variable value. If your JDK version is different, replacejdk-11.0.14with your version. Currently, Data Fabric 7.0.0 supports JDK 11. - In the System Variables section, select Path and then click Edit.
- Verify that
%JAVA_HOME%\binis listed. If it is not listed, add it. - Click OK on each system screen until they all close. To verify that JDK was
installed, open the Windows command prompt and
run:
C:\Users\myname> java -version

//The system should return the following:
java version "11.0.14" 2022-01-18 LTS
Java(TM) SE Runtime Environment 18.9 (build 11.0.14+8-LTS-263)
Java HotSpot(TM) 64-Bit Server VM 18.9 (build 11.0.14+8-LTS-263, mixed mode)
Install the HPE Ezmeral Data Fabric Client on Windows
The HPE Ezmeral Data Fabric client is
required to connect to the HPE Ezmeral Data Fabric cluster node running Drill. Note that when you download the client, the
client package name is mapr-client.
To install the Data Fabric client on your Windows PC, download the client package for Windows and then complete the installation and configuration steps.
- Create an
\opt\maprdirectory on yourc:drive. You can do this using Windows Explorer, or you can open the Windows command prompt and type the following in the prompt:mkdir c:\opt\mapr - Add the
MAPR_HOMEenvironment variable:- In Windows, go to View advanced system settings. The System Properties window appears.
- Select the Advanced tab.
- Click Environment Variables.
- Click New. The New System Variable window opens.
- Enter
MAPR_HOMEas the variable name. - Enter
MAPR_HOME=C:\opt\mapras the variable value. - Click OK.
- In the System Variables section, double-click the Path variable. The Edit Environment Variable window opens.
- Verify that the following variables appear in the
list:
%JAVA_HOME%\bin %MAPR_HOME%\bin - Click New and add
%MAPR_HOME%\hadoop\hadoop-2.7.6\bin.You should now see the following environment variables in the list:%JAVA_HOME%\bin %MAPR_HOME%\bin %MAPR_HOME%\hadoop\hadoop-2.7.6\bin - Click OK on all screens to exit the environment variables windows.
- Download the
mapr-clientpackage:- Go to
https://package.ezmeral.hpe.com/releases/v7.0.0/windows/<package_name>. - Click on the
mapr-client-7.0.0.0Windows client package to download it. - Right-click on the downloaded file and select Extract All…. Extract all to
the
C:\opt\mapr\folder. Once extracted, you should see several files and folders listed inC:\opt\mapr, as shown in the following image: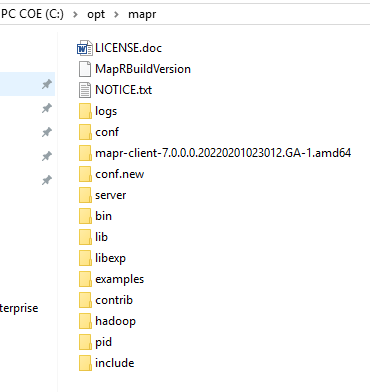
- Go to
- If your Windows command prompt is open, close it and reopen it.
- Go to the
C:/opt/maprdirectory by running the following command:cd /opt/mapr - Run the configuration script. These instructions assume that the cluster you will be
connecting to is secure. To run the configuration script, run the following command in
the Windows command
prompt:
server\configure.bat -N <cluster_name> -c -secure -C <node-ip-address>:7222NOTE-Nspecifies the cluster name.TIP If you do not know the cluster name, you can use Putty or a similar tool to access the node in the cluster that you want to connect the client to and get the cluster name from themapr-clusters.conffile. When you access the node, go to/opt/mapr/confand thencatthemapr-clusters.conffile, for example:cd /opt/mapr/conf cat mapr-clusters.conf //You will see something like the following example returned where myCluster is the cluster name: myCluster secure=true 10.10.10.279:7222-c(lowercase) specifies a client configuration.-secureindicates connecting to a secure cluster.-C(uppercase) specifies the CLDB node(s).- 7222 is the default port for the CLDB node.
- Copy the
ssl_truststoreandssl-client.xmlfiles from the/opt/mapr/confdirectory on the cluster node to theC:\opt\mapr\confdirectory on the Windows client. Using a tool like WinSCP is useful for this. - On the Windows PC, run the following command to create a ticket:NOTE When you connect to Drill, you will authenticate to Drill with the username and password that you use in this step.
This command creates a ticket formaprlogin password -user <DataFabricUserName><DataFabricUserName>, usually found in:C:\Users\<WindowsUserName>\AppData\Local\Temp\maprticket_<WindowsUserName> - In Windows, create a new environment variable named
MAPR_TICKETFILE_LOCATIONand set the variable value toC:\Users\<WindowsUserName>\AppData\Local\Temp\maprticket_<WindowsUserName>. - From the Windows command prompt, run a
hadoopcommand to validate that the client is connected to the cluster node:- Go to the
hadoop-2.7.6directory:cd /opt/mapr/hadoop/hadoop-2.7.6 - Run the following
hadoopcommand:hadoop fs -ls / //Note that the / indicates a directory path.
Found 5 items drwxr-xr-x - uid_5000 gid_5000 4 2022-02-07 06:22 /apps drwxr-xr-x - uid_5000 gid_5000 0 2022-02-07 06:10 /opt drwxrwxrwx - uid_5000 gid_5000 0 2022-02-07 06:08 /tmp drwxr-xr-x - uid_5000 gid_5000 1 2022-02-07 06:11 /user drwxr-xr-x - uid_5000 gid_5000 2 2022-02-07 06:11 /var - Go to the
Download the Drill ODBC Driver
- Go to https://package.ezmeral.hpe.com/tools/MapR-ODBC/MapR_Drill/MapRDrill_odbc_v1.3.22.1055/.
- Click
MapRDrill 1.3 64-bit.msito download the Windows 64-bit driver. - Click the downloaded file and follow the setup wizard to install the driver.
- If you received a license file through email, copy the license file into the
\libsub-folder of the installation folder. You must have administrator privileges to change the contents of this folder.
Configure the DSN
- In Windows, go to ODBC Data Sources. The ODBC Data Source Administrator (64-bit) window opens.
- In the ODBC Data Source Administrator, click the Drivers tab and then scroll down to verify that the MapR Drill ODBC Driver appears in the list of ODBC drivers installed on your system.
- click the System DSN tab.
- Click Add.
- In the Create New Data Source dialog box, select MapR Drill ODBC Driver and then click Finish. The Drill ODBC Driver DSN Setup dialog box opens.
- In the Data Source Name field, type a name for your DSN.
- To connect to the Drill node, select Direct to Drillbit and then type the IP
address or host name of the Drill server in the field beside the Direct to Drillbit
option and the port on which the Drill server is listening. The port is typically 31010,
for example:
10.10.10.279:31010. - In the Authentication Type drop-down, select MapRSASL.
- To test the connection, click Test. A successful connection returns a success message. If the connection fails, verify that the settings in the MapR Drill ODBC Driver DSN Setup dialog box are correct.
- Click OK to exit the windows.
Connect Tableau to the Drill ODBC Driver (DSN)
Note that version 2021.4.3 of Tableau was used to create these instructions.
- Open Tableau.
- Select Connect To Server > More > Other Database (ODBC). The Other Database (ODBC) window opens.
- In the DSN drop-down, select the DSN you created (when you completed the steps in the Configure the DSN section).
- Click Connect.
- Enter your credentials to authenticate and then click Sign in.... Use the same credentials you used when you created a ticket for the mapr-client.
- To verify that Tableau is connected to the Drill node, run a couple of test
queries:
- Double-click New Custom SQL.
- In the Edit Custom SQL box, enter the following query and then click Preview
Results...:
The query should return results similar to the following:SELECT * FROM sys.drillbits
- Close the View Data: Custom SQL Query + box.
- In the Edit Custom SQL box, enter the following query and then click Preview
Results...:
This query runs against a sample file (SELECT * FROM cp.`employee.json` LIMIT 3employee.json) included in Drill's classpath. The query should return the following results: