Step 5: Add the KMIP Client to the Domain
Describes how to add the KMIP client to the KMIP-enabled domain.
To add the KMIP client to the KMIP-enabled domain:
- Obtain a signed client certificate.
- Add the KMIP host to the domain.
- Import the signed client certificate associated with this KMIP host. IMPORTANT The
Common Name(CN) field of the signed client certificate must match the host name.
The certificate can either be self-signed certificate or a signed by an external CA that is trusted by the DSM. In this example, the KMIP trusted CA certificate is already installed in Step 3, and will be used to sign the CSR.
To obtain a signed client certificate:
- Use OpenSSL to create a Certificate Signing Request (CSR) that will be used to sign the
client certificate. Note that the name we entered into the Common Name field is
dsmqatest, which must match the KMIP host name in a later step:[root@qa-node125 vormetric_dsm_qa]# openssl req -newkey rsa:2048 -nodes -keyout dsmqatest.key -out dsmqatest.csr Generating a 2048 bit RSA private key ..............................................+++ .........................................................................+++ writing new private key to 'dsmqatest.key' ---- You are about to be asked to enter information that will be incorporated into your certificate request. What you are about to enter is what is called a Distinguished Name or a DN. There are quite a few fields but you can leave some blank For some fields there will be a default value, If you enter '.', the field will be left blank. ----- Country Name (2 letter code) [XX]:US State or Province Name (full name) []:San Jose Locality Name (eg, city) [Default City]:California Organization Name (eg, company) [Default Company Ltd]:Hewlett-Packard Enterprise Organizational Unit Name (eg, section) []:MapR Common Name (eg, your name or your server's hostname) []:dsmqatest Email Address []: Please enter the following 'extra' attributes to be sent with your certificate request A challenge password []: An optional company name []: - Get the certificate signed by the trusted CA.
To add the KMIP host to the domain:
- Log on to the DSM Web UI as an administrator with privileges of type
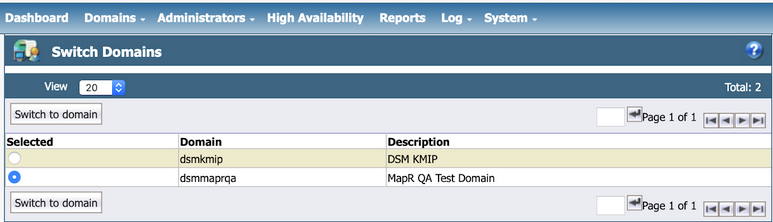
All. In our example, the administrator isalladmin. - Navigate to and select the domain you have just created. In this example, the domain is
dsmmaprqa. - Click Switch to domain:
- From the
Hostsmenu, click Hosts: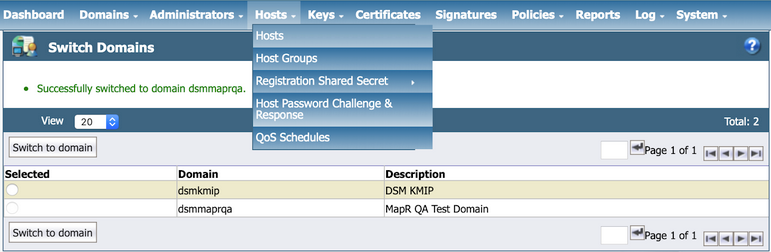
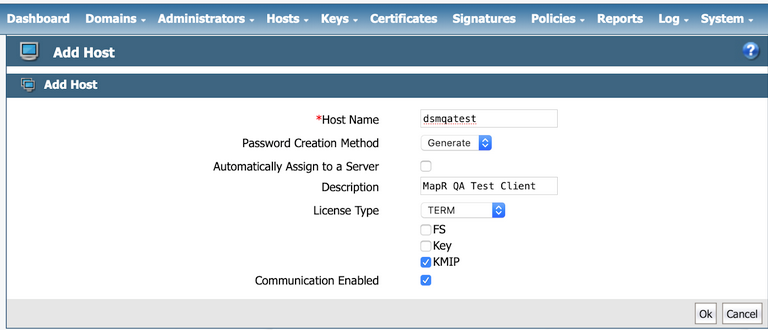
- Click Add. Enter the following information in the
Add Host dialog:- The Host Name must match EXACTLY with the common name (CN) that you have configured
in your KMIP client certificate. In this example, the
CN is
dsmqatest, so the hostname must also bedsmqatest. - Leave the Password Creation Method at its default value of
Generate. - DO NOT select the Automatically Assign to a Server option.
- Enter a description for the KMIP client.
- Select the license type. This must match the KMIP license that you have configured for this DSM. After you enter the correct license type, a few license choices appear. Select TERM as the license type.
- Select the KMIP option.
- Select the Communication Enabled option to enable your KMIP client to communicate with the DSM KMIP server.
- Click Ok to add the KMIP client.
- The Host Name must match EXACTLY with the common name (CN) that you have configured
in your KMIP client certificate. In this example, the
CN is
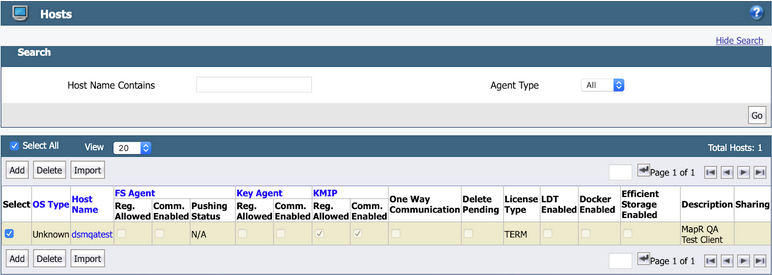
The KMIP client is then added to the list of hosts, as shown in the following example:
To import the KMIP certificate for the host:
- Click the Host Name field, which is
dsmqatestin the example. - Scroll down to the end of the
Edit Hostspage and click Import KMIP Cert: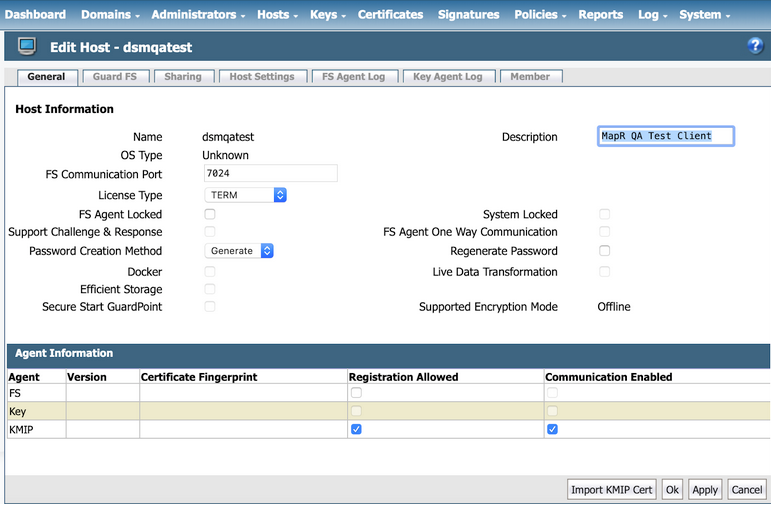
- Click Choose File to select the client certificate that you have
created. IMPORTANT If you are uploading a client certificate signed by an external CA, then that external CA must first be configured into the DSM.
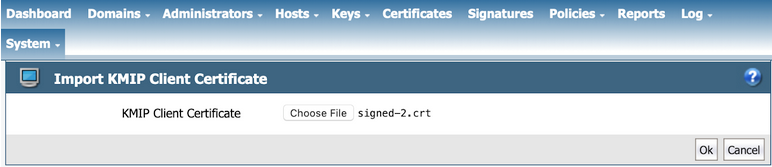
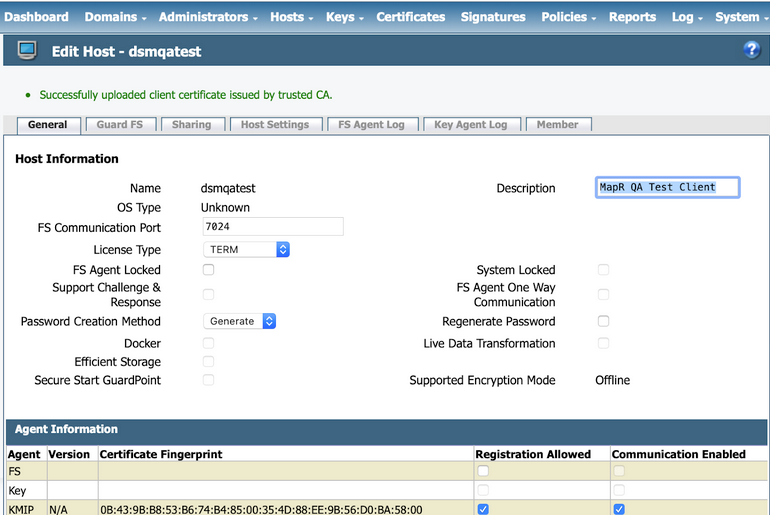
- Click OK to import the client certificate. The certificate is then
imported, as shown in the following example:
The integration is now complete. You should have the following pieces of information, either
downloaded from the DSM or obtained externally:
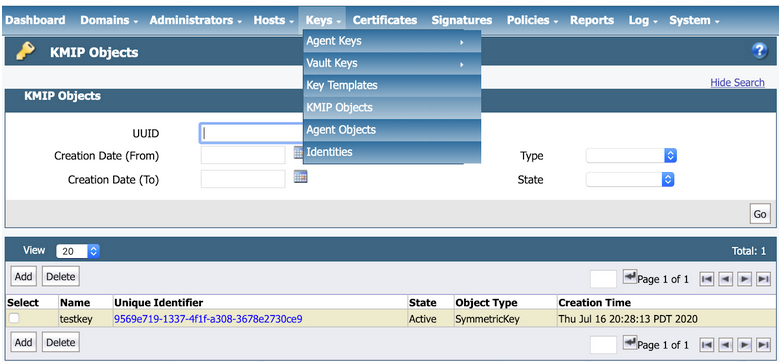
To test the KMIP connection, view the KMIP objects under as shown in the following example:
At the end of this phase, you should have the following files that are needed to set up your
data-fabric KMIP client, in addition to the list of IP addresses
and port number of the key management appliances:
- The CA used to sign the client certificate. This is the local CA that is downloaded from the Vormetric DSM.
- The signed client certificate that was signed by the KeySecure local CA and downloaded from the Vormetric DSM.
- The client private key which was generated using OpenSSL.
Continue the setup on the data-fabric CLDB node using the configure.sh script with the HSM parameters, or the mrhsm Commands.