Running the MapR Azure Templates
About this task
Procedure
-
Download the
mainTemplate.jsonfile from GitHub. For more information about the template, see About the MapR Reference Templates for Azure. - Navigate to the Azure portal, and click New (+).
- In the search field, type Template deployment.
- Click Create.
-
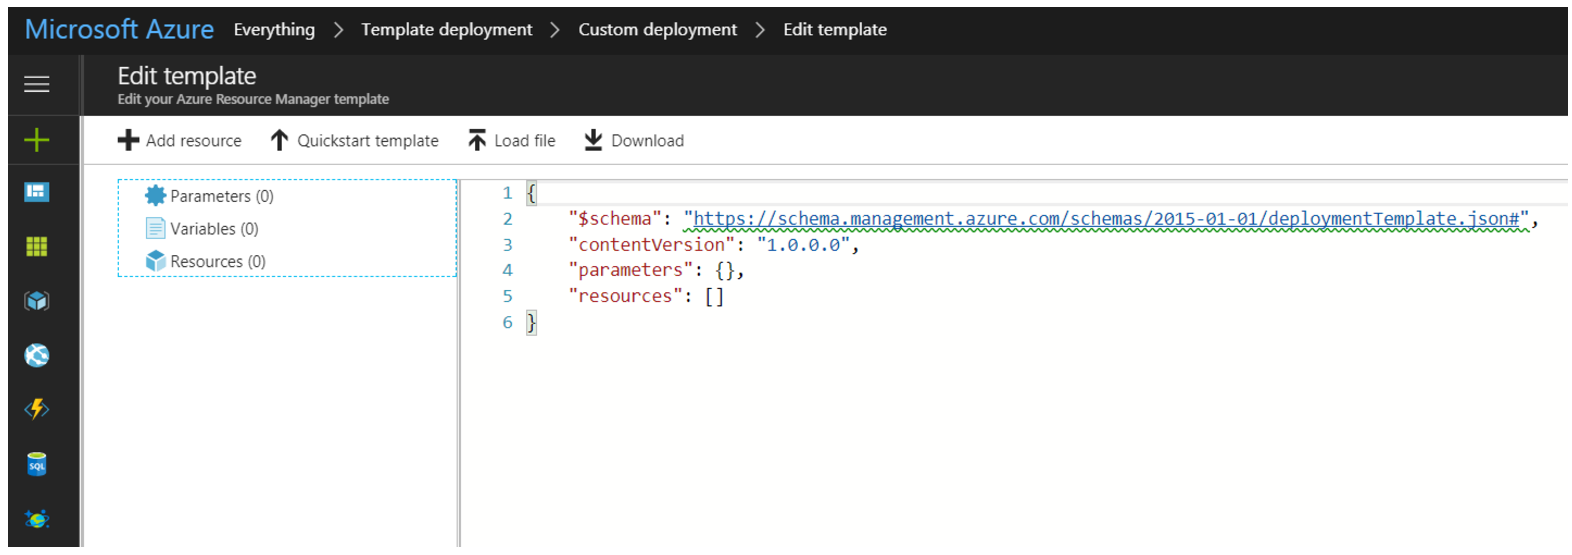
Click Build your own template in the editor. In the
Edit template screen, you can load a file or paste
the contents of a template into the work area.
-
Paste the contents of the
mainTemplate.jsonfile into the Edit template working area. - Click Save. The template fields are displayed.
-
In the Basics section, enter your site-specific values for the following
fields:
- Subscription
- Resource group (new or existing)
- Location
- In the Settings section, enter the username for the virtual machine in the Admin Username field. This is the username for the virtual machine.
- In the Admin Auth Type field, enter the authentication type (password or SSH public key) for the virtual machine.
- In the Admin Password field, enter the password for the virtual machine.
- In the Admin Public Key field, enter the public key authentication for the virtual machine. If you entered an Admin Password, this field can be left blank.
- In the Cluster Name field, enter your cluster name.
-
In the Cluster Admin Password field, enter the password
corresponding to the MapR UID. For MapR images, the user defaults to
mapr.NOTE For cloud deployments, the installer uses the Cluster Admin Password as the MySQL root password when it creates a MySQL database for certain services that require a database. - In the EEP Version field, enter the Ezmeral Ecosystem Pack (EEP) version.
- In the Service Template field, enter the auto-provisioning template corresponding to the services you need. For more information, see Auto-Provisioning Templates.
- In the Node Count field, enter the number of nodes.
-
In the Instance Type field, enter one of the following
instances. MapR Azure templates support the following instance types. For more
information about Azure instance types, see Sizes for Linux Virtual Machines in
Azure.
- Standard_D4s_v3
- Standard_D8s_v3
- Standard_D16s_v3
- Standard_DS12_v2
- Standard_DS13_v2
- Standard_DS14_v2
- Standard_DS15_v2
- Standard_DS3_v2
- Standard_DS4_v2
- Standard_DS5_v2
- Standard_E4s_v3
- Standard_E8s_v3
- Standard_E16s_v3
- Standard_E32s_v3
- Standard_F8s
- Standard_F16s
- Standard_GS2
- Standard_GS3
- Standard_GS4
- Standard_L4s
- Standard_L8s
- Standard_L16s
- Standard_L32s
- In the Disk Type field, enter the disk type to use for managed disks (Premium_LRS, Standard_LRS).
- In the License Type field, enter your license type.
- In the Disk Size field, enter the size in gigabytes (GB) of each disk.
- In the Disk Count field, enter the number of disks.
- In the Public Access CIDR field, enter the public Internet access CIDR. (Use * for all Internet traffic.) This field allows you to set or restrict the outside Internet IP addresses that can access the cluster.
-
In the Install Open VPN field, enter
trueif you want to install OpenVPN to enable access to a private cluster. For more information about OpenVPN, see Using OpenVPN. - In the Open Vpn User field, enter the login user for OpenVPN.
- In the Open Vpn Password field, enter the password for the OpenVPN login user. Use a strong password to protect your cluster.
- In the Vnet Name field, enter the name of the virtual network.
- In the Vnet Resource Group field, enter the resource group where the virtual network will be created.
- In the Vnet Address Prefix field, enter the address prefix for the virtual network.
-
In the Vnet New or Existing field, enter
neworexistingto describe the virtual network. - In the Vnet Private Subnet Name field, enter the subnet name of the virtual network.
- In the Vnet Private Subnet Address Prefix field, enter the private subnet address prefix of the virtual network.
- In the Vnet Public Subnet Name field, enter the subnet name of the virtual network.
- In the Vnet Public Subnet Address Prefix field, enter the public subnet address prefix of the virtual network.
- In the Vnet Public Subnet Start Address field, enter the public subnet start address of the virtual network.
- In the Location field, enter your region
- Click the option to agree to the terms and conditions.
- Click Purchase.
-
Navigate to the Azure resource groups page to monitor the creation of the
cluster.
NOTE Cluster creation for a three-node cluster can take 15-20 minutes. Depending on the size of the cluster, cluster creation can take hours in some cases.